I was otherwise engaged for the first two days of the 2014 CANCON, so only entered the FOG tournament for the 3rd day. After repeated lack of success with armies based on average protected foot, this time I tried superior armoured cavalry in the form of a Western Turk (Khazar) army, consisting of:
4 x 4 LH average unprotected bow sword “Other horse archers”
3 x 4 Cavalry superior armoured drilled bow sword “Arsiyah”
3 x Cavalry superior armoured undrilled lance sword (1 x 4 + 2 x 6) “Nobles”
8 MF poor, unprotected, undrilled Light Spear “Slavs”
6 LF poor unprotected bow “Slavs”
FC + 2 x TC
I had used the army in one previous game, about 3 years ago, and once with a significantly different composition about a year ago and hadn't played much FOG recently, but it looked as though it ought to be simple enough to use without getting myself in a mess.
Game 1 vs Roy Inglis, Palmyran.
I was quite rusty on the rules and Roy wasn't much better, so we had to keep looking things up, which slowed the game down a bit.
I think I won the initiative and gave it up to get first move. Terrain fell mainly around the edge of the table and had little effect on the game.
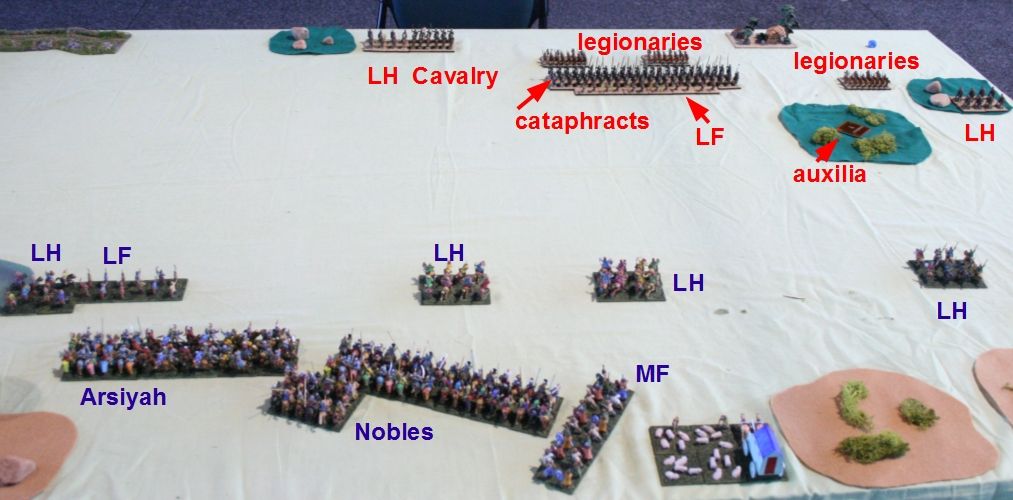
I deployed the Arsiyah and Nobles in two blocks behind a screen of light troops and the MF next to the camp.
The Palmyrans deployed 4 x 4 undrilled cataphracts near some rough terrain (brush), screened by a single rank of LF and with two BG of super skilled legionaries behind (with 3rd rank LF). The brush contained an ambush marker, which turned out later to be MF auxilia so we moved them back to where they could legally deploy. Further to the right as I looked at it were more legionaries and some Palmyran LH Bow light spear. To the left were Roman cavalry (Average armoured light spear sword) and LH light spear.
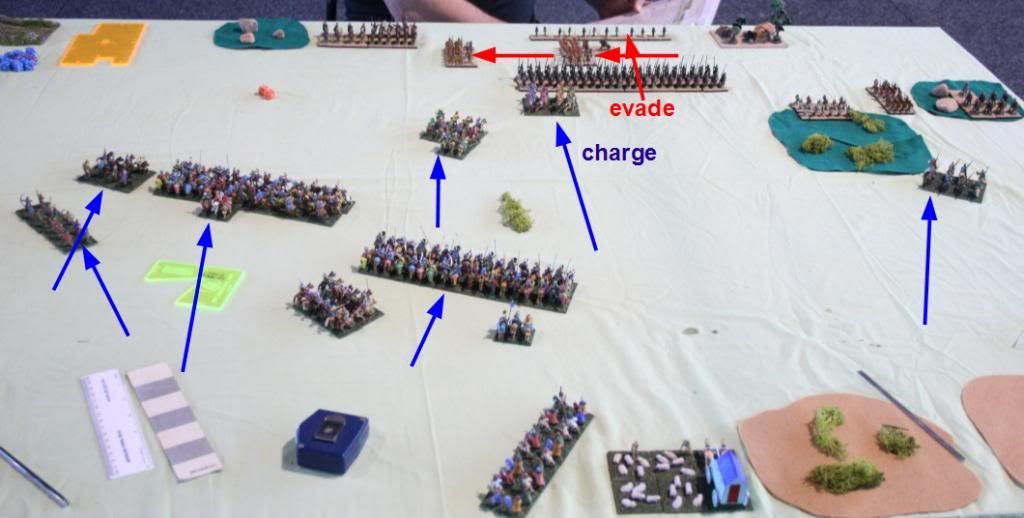
I moved the LH forward to prevent double moves, the Arsiyah towards the Roman cavalry and the Nobles forward cautiously as I didn't want to fight the cataphracts until their flank was exposed. Roy moved his legionaries from behind the cataphracts in order to prevent said exposure. I charged the LF with LH so at least I could shoot at the cataphracts and force them to test not to charge.
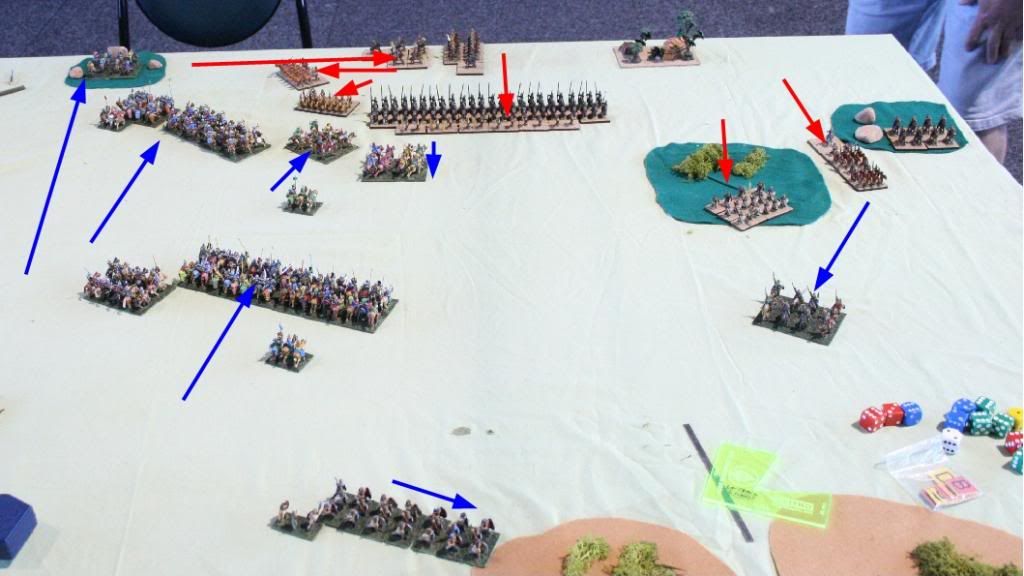
On the right, the Roman infantry came up to threaten my LH, who ran away. For some reason the Palmyran LH was reluctant to move. In the centre the Palmyran LF human shields again interposed themselves between LH and cataphracts. On the left, the Roman legionaries established a defensive perimeter, behind which the mounted troops quickly withdrew. The Arsiyah started shooting at the legionaries.
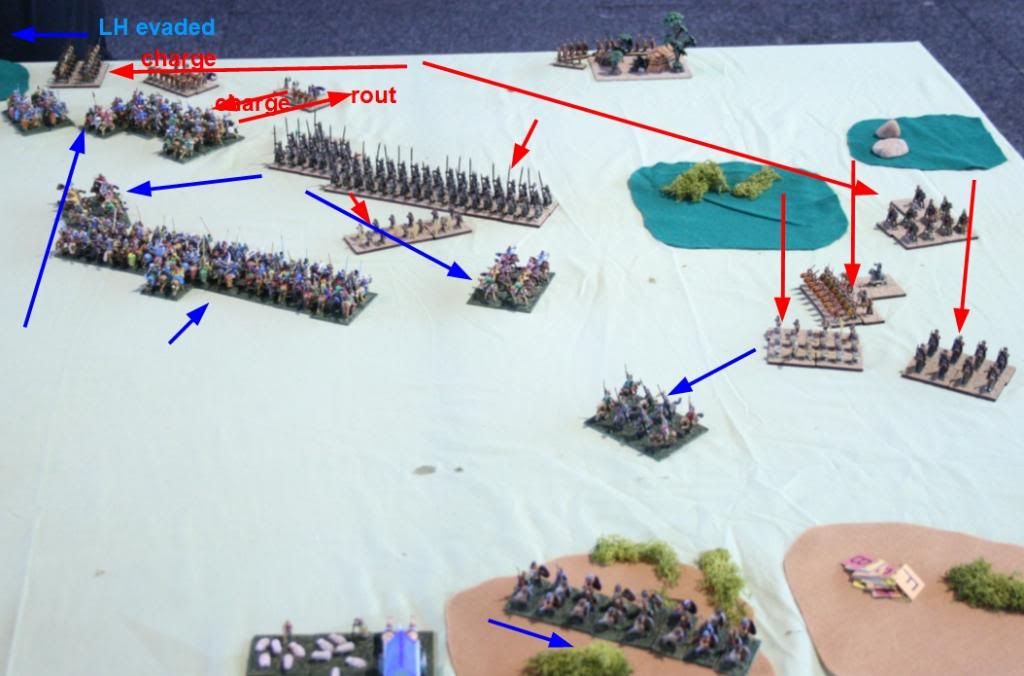
Finally the Palmyran LH emerged and they were followed by the Roman LH that had been double-moving across from the other flank. There were now 2 BG of Roman infantry, 2 of LH and 2 generals chasing my 1 LH unit.
In the centre I pulled back my LH as it was achieving nothing and might get trapped between the two main battle lines. The enemy LF chased after one group and the cataphracts wheeled and advanced a short move towards the nobles, though one BG failed its CMT and got slightly left behind.
On the left, one of the legionary BGs charged my Arsiyah, lost cohesion on impact and was soon routed. My 4th LH BG joined in the bombardment of the legionaries until the Roman cavalry turned round and charged it away.
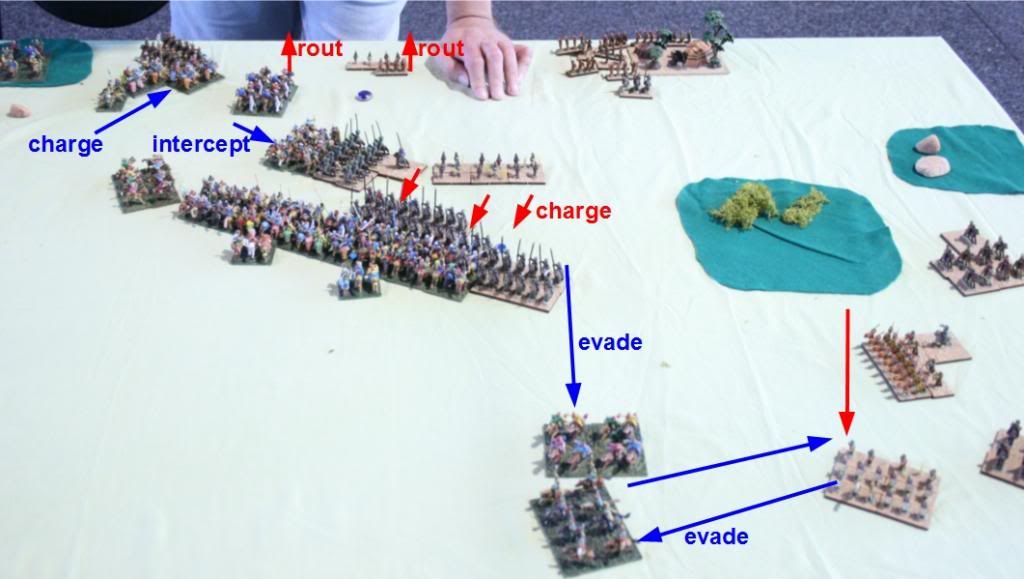
The Roman cavalry were then flank charged and the second legionary BG was charged and routed. I think it had lost some cohesion from shooting prior to this. We both forgot to drop the cavalry's cohesion from the flank charge, but they disrupted after impact. In the Palmyran turn the Auxilia charged my LH again and finally all the cataphracts charged, including one that didn't want to (this was then flank intercepted). All the Khazar nobles had generals with them, but none of the Palmyrans did and two of their BGs disrupted on impact and one lost a base.
At this point time was called so there was no more combat. I was ahead and feeling fairly confident, though even disrupted cataphracts could have done me serious damage in the melee with their better armour POA.
Game 2 vs Garry Koppes, Mongol Invasion.
I can't remember who won initiative, but it looks from the pictures as though I moved first. Terrain was steppe, (no surprise there) and there were no features of any significance.
Garry deployed a long line of single ranked cavalry ending opposite my right with three BG double ranked, and 2 BG of LH to the right of them. One more BG of cavalry was in reserve. The cavalry was a mixture of average and superior, protected and armoured and I soon lost track of which was which. Everything was bow/sword.
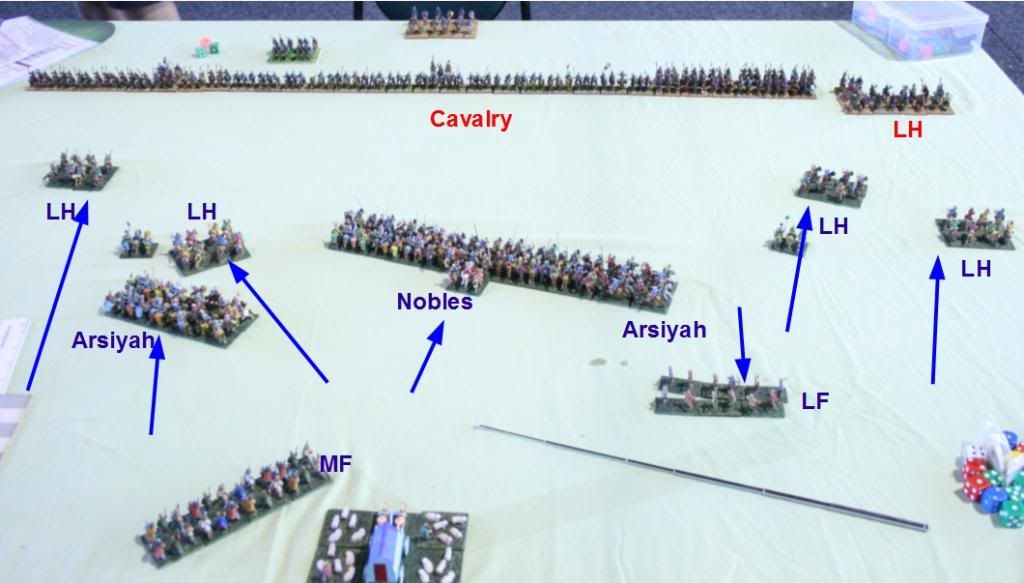
I deployed the block of nobles centrally, flanked by Arsiyah on both sides and with the light horse in front of or outside them. On the first turn I moved forward, aiming the heavy troops towards the double-ranked cavalry.
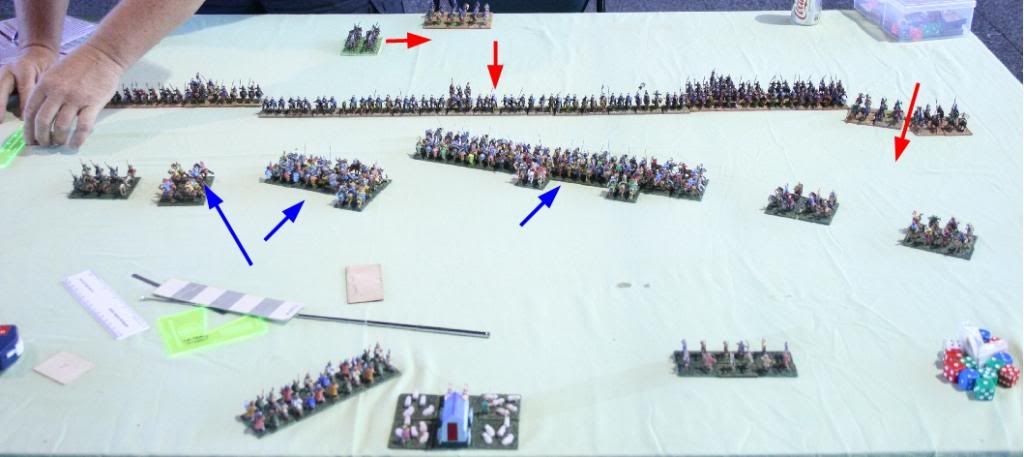
The Mongols advanced to put pressure on my exposed left flank and get the double-ranked cavalry out of the path of the lancers. My advance slowed while the separated group of Arsiyah caught up.
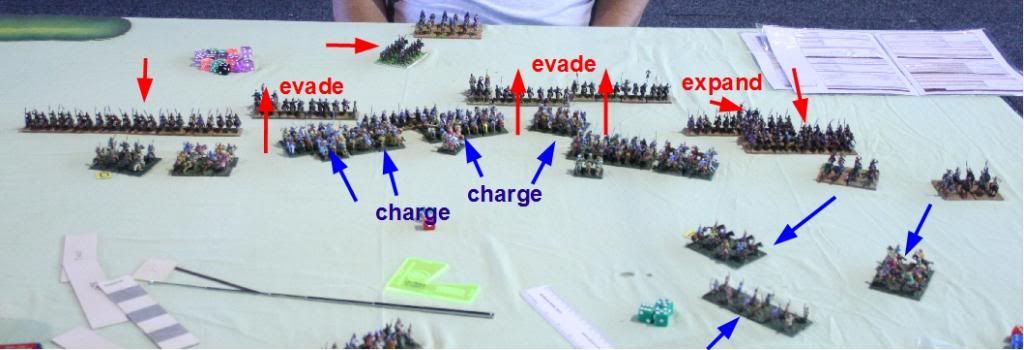
The two lines continued to close and in an exchange of arrows two of my LH BGs disrupted while doing no damage in return. In the centre several of my BGs charged. Some Mongols evaded, but others stood to receive the charge and lost a base in the impact. My LH on the right withdrew as one was disrupted and neither wanted to get stuck in melee with the Mongol LH when there were cavalry reinforcements about that might join in.
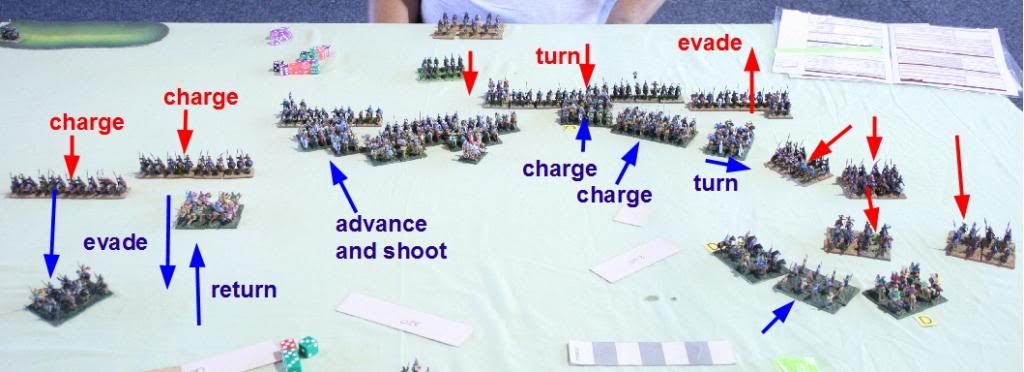
The Mongol evaders turned round to shoot, disrupting the 4-base Nobles BG that was stuck out on its own after the charges. On the left they charged my LH with cavalry, on the right, chased after it. This enabled me to gang up three units shooting at one. Unfortunately this had no effect and another of my LH went disrupted. In the centre there was no point in hanging around to get shot, so I charged again with the lancers. This time two of the Mongol BGs stood as they were charged only by a 4-base disrupted BG. One of these Mongol units disrupted in impact, but for some reason neither fed bases into melee, so they missed out on a few dice and did no damage in the melee. The Khazar BG was able to rally off its disruption in the JAP. An unengaged Arsiyah unit turned to face off the threat from the right flank.
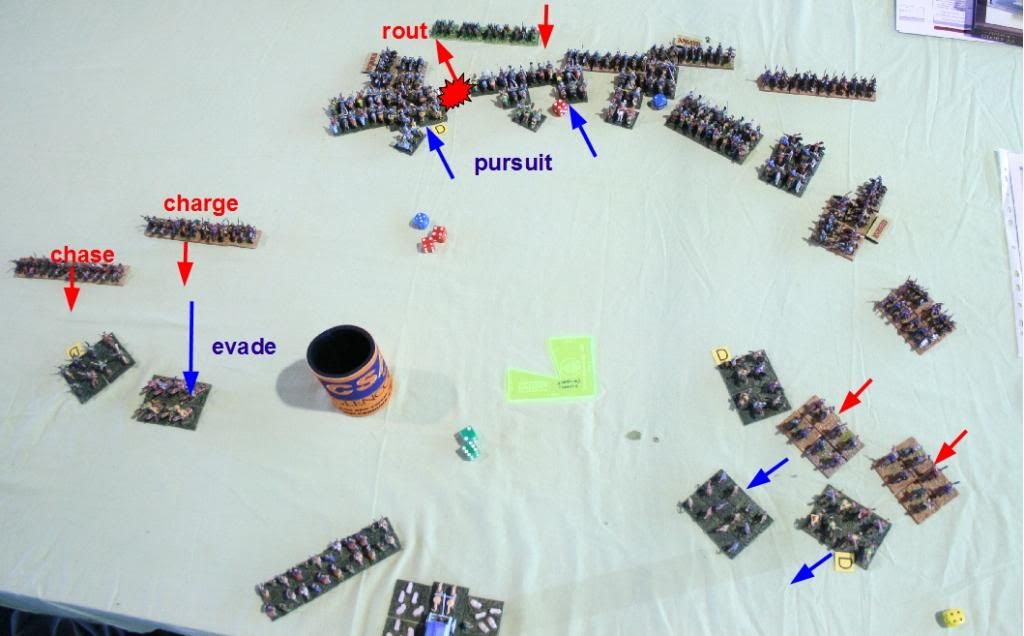
On the left, the free Mongol units charged and chased my LH and again failed to catch them. Elsewhere there was a lot more combat and the first Mongol unit broke. The pursuit hit two more units, one of which could have evaded, but didn't and the other would have been bypassed if it had contracted in melee earlier on. Combats went well for the Khazars and various Mongol BGs lost bases or cohesion. There was more ineffectual skirmishing on the right.
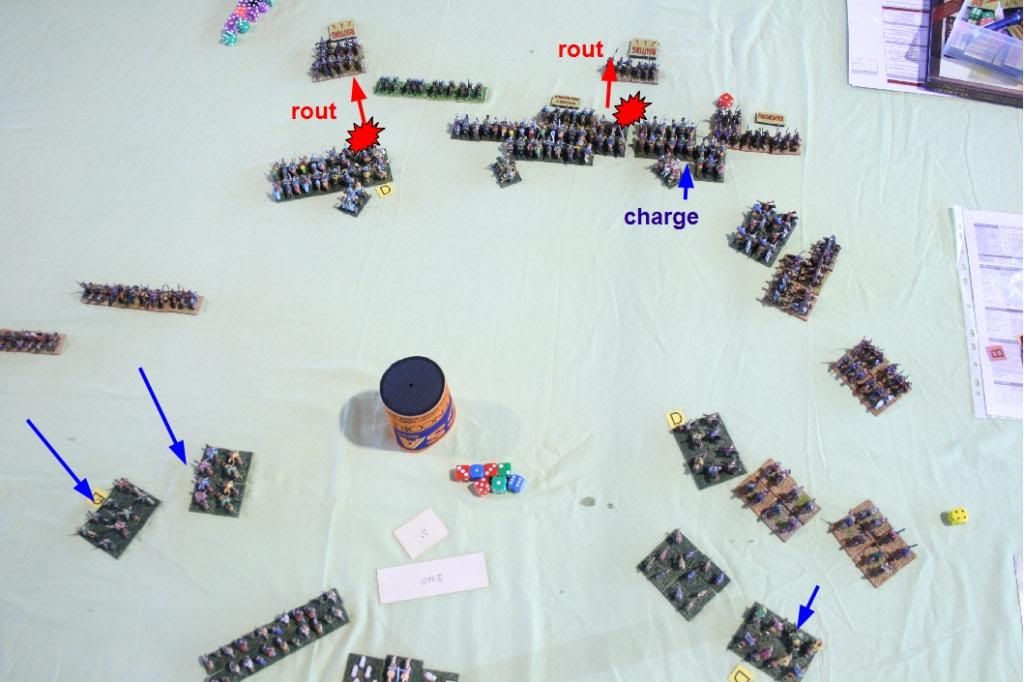
Battle raged and the third unit of Khazar Nobles charged into an already engaged Mongol unit, stepping forward into another, which for some reason declined to evade. Two more Mongol units broke and two fragmented. The Khazar skirmishers pulled back slightly on the right and as much as possible on the left.
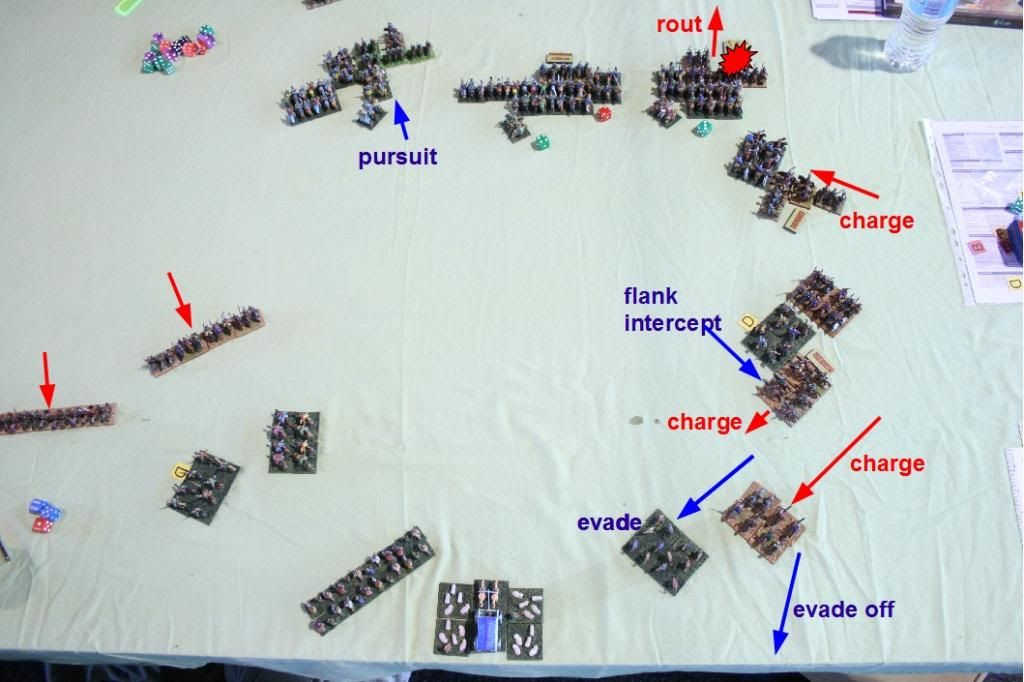
One of my pursuits hit another Mongol unit but did no damage. On the right, the Mongol LH charged. One BG was flank intercepted by my LH, but apart from the drop on contact, suffered no ill effects. Cavalry moved up to threaten a flank charge next time. The other BG forced my other LH off the table, but failed to catch the LF. More cavalry charged one of my Arsiyah BGs, but despite having the advantage of a general, did no damage and ended up disrupted and down a base. One of the Fragged units broke, but the other miraculously survived 8 dice versus 1.
At this point my opponent declared his army broken. Having lost track of what was routing some time ago when my centre was simply charging or pursuing into everything in sight, I assumed he was right. However, looking at the photos I reckon he was only 9 AP down from a 12 BG army. He would not have lasted much longer, but could have picked up quite a few points now his flank forces were closing in on my skirmishers and camp. If he had delayed things in the centre by evading instead of standing, he could easily have come out ahead.
Overall the army seemed to perform well, but I was aided by what seemed to me significant mistakes by my opponents and had some good luck as well. In the second game the army could have done with an extra general, but couldn't have afforded any fewer troops really, except the Slavs, and they might be needed in a tough game to stave off an army rout or protect the camp from marauding LH. Any suggestions on improving the army design would be gratefully received.
Many thanks to my opponents and to Ross for running the comp and accepting my 1-day entry.
Lawrence Greaves


