AAR 2nd War Campaign Very Hard

Moderators: Slitherine Core, BA Moderators, WH40K Armageddon moderators

nexusno2000
Sr. Colonel - Battleship
Posts: 1679
Joined: Mon Feb 24, 2014 5:15 pm

Re: AAR 2nd War Campaign Very Hard

Post by nexusno2000 »

The enemy's first line of defense is revealed.

Image

Nothing major; I'll use my lovely Bombards first, followed by Inf assaults. I immediately get some love from my mortar: the Command unit spots a Tauros hiding by the river - the mortar one-shots it to the Warp.

Image

I wipe out the Inf in the manufactorum. I move cautiously forward. Knowing Jaxxon the biggest danger now is him rushing units down the road to do some suicidal frontal attacks. Destroyers he's got aplenty. And a wheeled Tauros can move a LOT of hexes along that road to get in close and nasty.

Image
Green Knight
https://www.youtube.com/c/GreenKnight2001
nexusno2000
Sr. Colonel - Battleship
Posts: 1679
Joined: Mon Feb 24, 2014 5:15 pm

Re: AAR 2nd War Campaign Very Hard

Post by nexusno2000 »

I was wise to take it slow: Jaxxon rushes me with a Destroyers (gets nailed by hvy bolter support/Russ Annihilator) and a lascannon Tauros (which opts to kill 2 inf in my Command platoon - a strange choice).

I move forward, hammer down the Tauros, the turret and the Inf guarding the next objective, taking 0 losses (total losses are now 2 command, 1 flamer).

Image

The enemy tries to retake the objective by sending forward some militia. They fall short of the buildings and hang around in the open, waiting to be killed. Another Jaxxon special.

Image

My Command (spotting 3 is nice!) detects a Hellhound. This is a very nasty, range 3 vehicle - incredibly durable (3 hits, good Armor). I'm forced to pound it with 3 Bombards and then add some Leman fire on top of that. My Leman is hurt by return fire, but I don't lose any Str.

I reorganize and push forward. There is little opposition, but I spot some enemy artillery on the hive base that needs killing.

Image

I move cautiously, using long-range fire to kill the enemy.

(I think Inf in building should be more durable; as it is they are easily wiped out by long-range fire from artillery, mortars, hvy bolters - I rarely need to storm).

A Tauros appears. With lascannons. It decides to park in the middle of the street. Jaxxon again I'm sure.

Image
Green Knight
https://www.youtube.com/c/GreenKnight2001
nexusno2000
Sr. Colonel - Battleship
Posts: 1679
Joined: Mon Feb 24, 2014 5:15 pm

Re: AAR 2nd War Campaign Very Hard

Post by nexusno2000 »

The final enemy line. Looks tough, but it isn't: again the enemy is plagued by weak leadership and a lack of faith in the God-Emperor.

My cleverly positioned Salas rush along the flank and one-shot one Basilisk each (already dead in the pic).

Image

The Macharius dies from massed bombard fire - my first super-heavy kill!

Commander Maximus orders a general advance, utterly devastating the enemy lines.

Image

My forces regroup, kill the last unit on turn 8 and take the objective on turn 9.

Image

Another victory for Maximus. Sitting in his command Chimera he's in a foul mood. Jaxxon was executed before the start of the war games, but he's not the only incompetent commander in the Steel Legion. Are they all like this? Will the orks be as stupid?
Green Knight
https://www.youtube.com/c/GreenKnight2001
nexusno2000
Sr. Colonel - Battleship
Posts: 1679
Joined: Mon Feb 24, 2014 5:15 pm

Re: AAR 2nd War Campaign Very Hard

Post by nexusno2000 »

Act 1 - Mission 1: Investigate
Seems the Orks are here at last. Yarrik was right. I'm not surprised.

(because I played the Battle for Armageddon boardgame back in '92?)

Image

I'm going for the Investigate. Because headless assaults are more Jaxxon's thing (and he got a bolt-shell to the head for his efforts). And because the Emperor's Tarot tells me that mission has more available Prestige than the other one. So there goes.

Image

Jaxxon made me suspect. This confirms it: Armageddon is home to the galaxy's top douchebags.

Image

No new unit cores. Only 500 Req to spare. Not a lot of love there. There are, however, lots of new units to pick from.

(walkers are the exception - what a lame 'group' of units - the game should REALLY include more variants; just throw in a few new weapon combos for the God-Emperor's sake!)

Image

I won't be needing much assault capacity, so my flamers turn into halfling, sorry, ratling, snipers. The rest of the Inf stay as is.

One of my tanks turn into a Range 4 Russ. The jury is still out whether this is a good trade or not, the 2-shot 4 range, 100% acc cannon with excellent dam + pen is very nice, but the aux weapons aren't. I suppose the +5% unit acc bonus also helps a bit. But is it better than 3 lascannon shots? And if so, enough to compensate for hvy bolter + storm bolter vs. double bolter? I think it might be the better choice - on paper - in real life it is somewhat disappointing. So that's why I only upgrade one.

Two of the Bombards become Basilisks. Range 6 baby. Triple shot. Hvy bolter. Unfortunately it has worse Def and a less powerful gun. Which is why I keep one bombard; it has it's uses (and I'm almost out of Req).

I thought about turning one of the Salas into a Hellhound (or one of the other variants). They are damned tough and have good guns. They do, however, have lousy range. Maybe if I had more Req and one extra slot, I might use it as a combination suicide/coup de grace unit.

Image

Fairly traditional deploy I suppose. I'm going down south first so this is about as good as it gets.

Image
Last edited by nexusno2000 on Mon Jan 26, 2015 11:05 am, edited 1 time in total.
Green Knight
https://www.youtube.com/c/GreenKnight2001
nexusno2000
Sr. Colonel - Battleship
Posts: 1679
Joined: Mon Feb 24, 2014 5:15 pm

Re: AAR 2nd War Campaign Very Hard

Post by nexusno2000 »

I move down the map, my Inf to the left to seize the buildings, the tanks on the road, the hvy guns in the middle, and the recons screening the right. I'm not so concerned with being rushed; otherwise the artillery would be further to the left. I spot some Grots, kill them, and then spot some more. By Holy Terra, those units are HUGE!

Image

First real Orky unit encountered. Why does it do a Jaxxon special? Walking up the road, then standing there dumbfounded...not a good tactic.

Image

My tank crews get some training softening up the Ork walkers. But the real killer is the Mortar. You gotta love those 1.03 SL platoon sizes! If someone thinks Inf is bad now, I challenge them to play through the game with the old squad size and compare. It's a WHOLE other ball game. Not saying they are TOO god, only that they are now good choices for their price.

Image

Unsurprisingly there are more orks down there. I mange to hit one with my Basilisk. I'm regretting my sloppy artillery placement - and not upgrading the last Bombard. I have a swig of amasec as I wait for my forward observers to report back.

Image

They report masses of orky Inf approaching. None of them fire at me though, so my cunningly positioned mortar crews don't get to fire in support :'(

Relatedly: why don't AT support have the Support trait? I think they should have. If they did it would be a very useful unit. Currently it's meh.

Image

My units fire on the orks. Commander Maximus personally leads the charge that breaks the ork advance.

Image

Only one orky unit survives. Normally even 1 unit with shootas can be a real pain...and this one is Str 67!!! I'm not too concerned though; my Command platoon goes Turtle, ringed by Russes, and backed with Support units. If the ork attacks - which I sincerely doubt - he'll be stopped cold in his tracks. If the Command DOES NOT go turtle, it will be in real trouble, because the ork will most likely fire on it, support unit be damned. Using your Chimeras like this can mean the difference between life and death.

Image

I wipe out the last orks and move east. Gotta hurry!

Image
Last edited by nexusno2000 on Mon Jan 26, 2015 11:09 am, edited 2 times in total.
Green Knight
https://www.youtube.com/c/GreenKnight2001
nexusno2000
Sr. Colonel - Battleship
Posts: 1679
Joined: Mon Feb 24, 2014 5:15 pm

Re: AAR 2nd War Campaign Very Hard

Post by nexusno2000 »

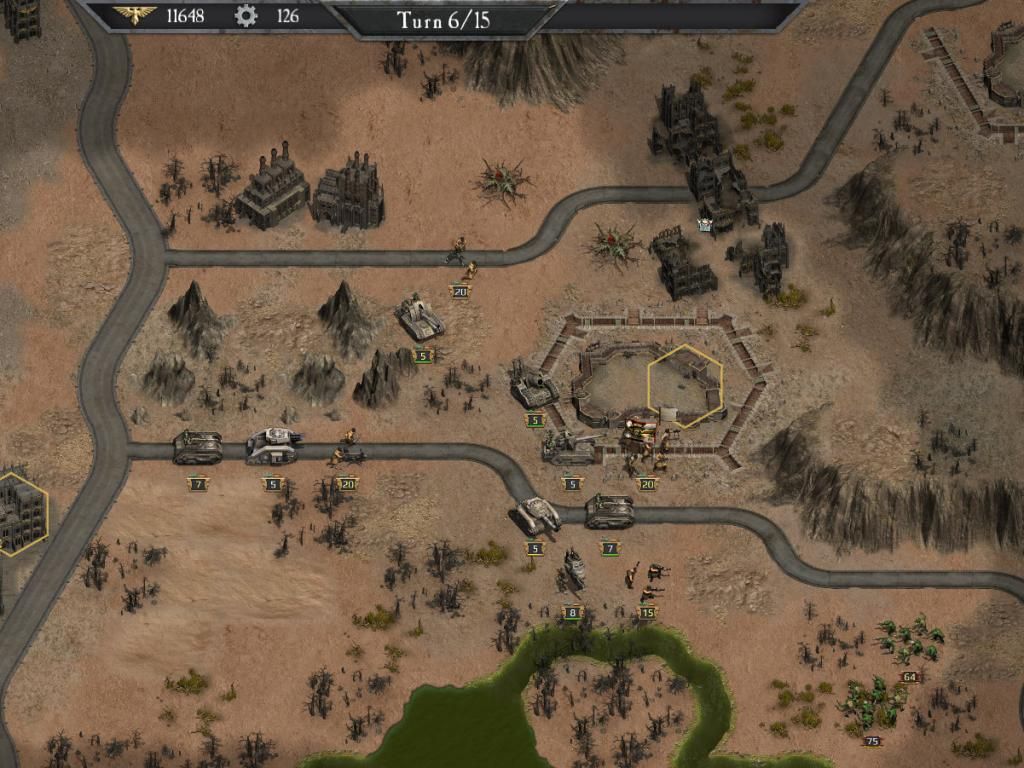
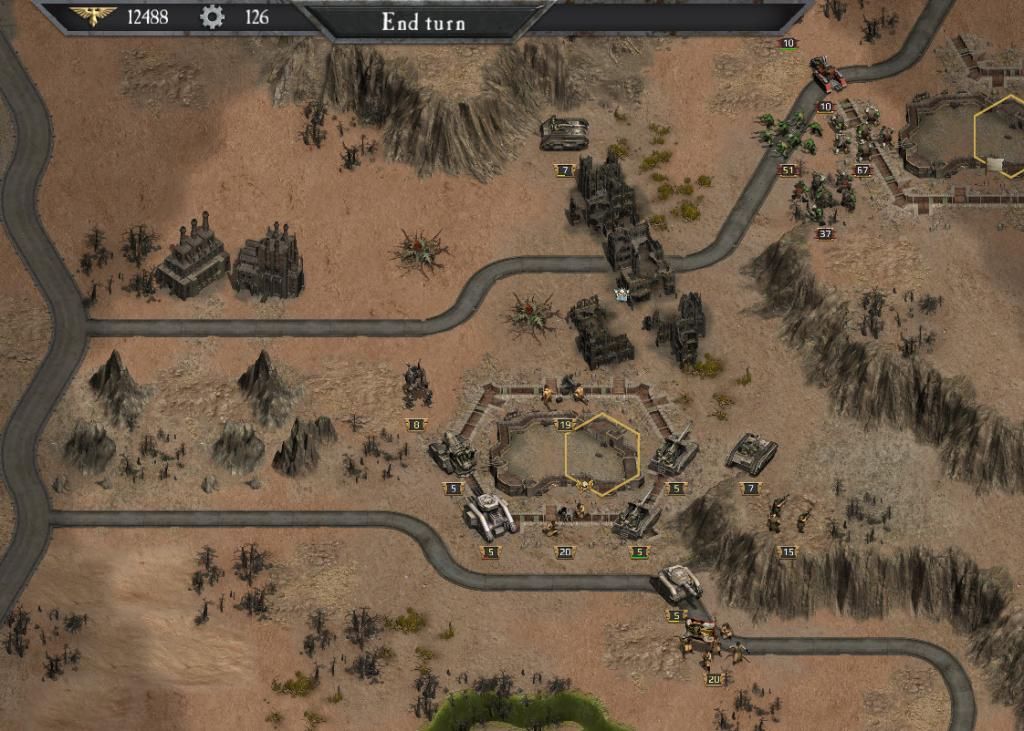
I feel a strong urge to rush my Command platoon forward and grab the next objective...but that would be very foolish. I need to take a short stop and wait for my stragglers to catch up.

The only 'offensive' thing I do is send forward my Ratling scout-snipers. Marine Force Recon has nothing on these guys...with Spot 4 they can see orks for miles away...long before they can see me. High Spot...that's an ability that should not be underestimated. Couple it with long-range firepower and you're set for victory. Against the AI anyway.

My own force has one Sniper and one Walker, both Spot 4. The Recons and the Command has Spot 3. Coupled with 3 Aty, 2 Inf Support, and Chimeras etc, all with Range 3...incredibly potent combination, especially since orks have most Spot 2 (or even Spot 1 for some units).

Image

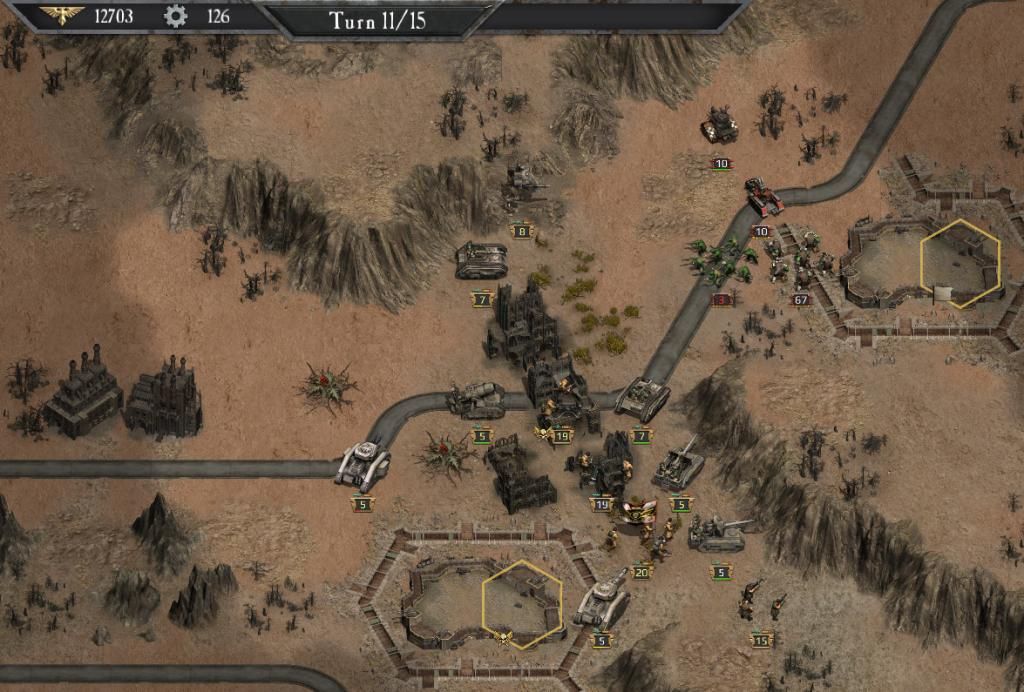
My armor and artillery slowly rumble into position. I chance bringing a Sala forward to spot anything on top of those cliffs. I start hitting the ork mechs down in the corner; they start with Str 12 and are thus INSANELY resilient!

Image

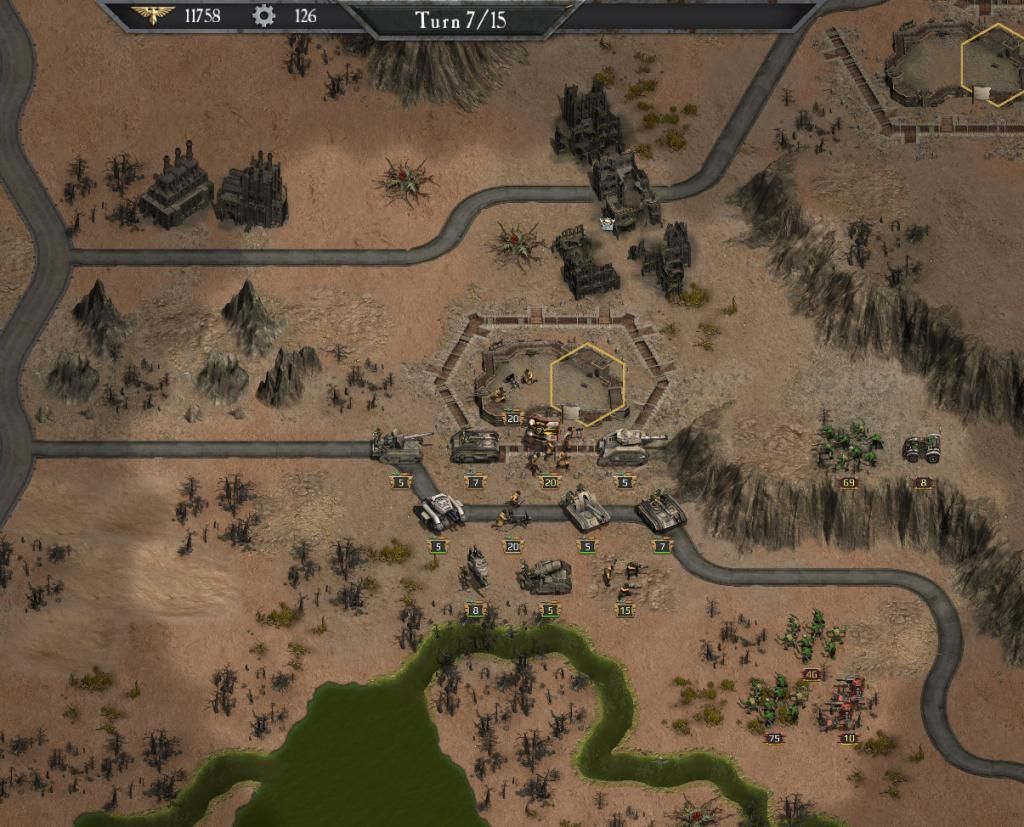
I push forward the last bit, capturing the objective, and set up an interlocking defensive fire pattern. There is only one hole: from the cliff and down on the hvy bolter. For some reason I didn't see that one coming! But the ork buggies are already low on Str and morale, so do VERY little damage. The mechs, the only units that could have hurt me in melee, wander off and stand there facing the cliffs. Maybe they are trying to run away!?

Image

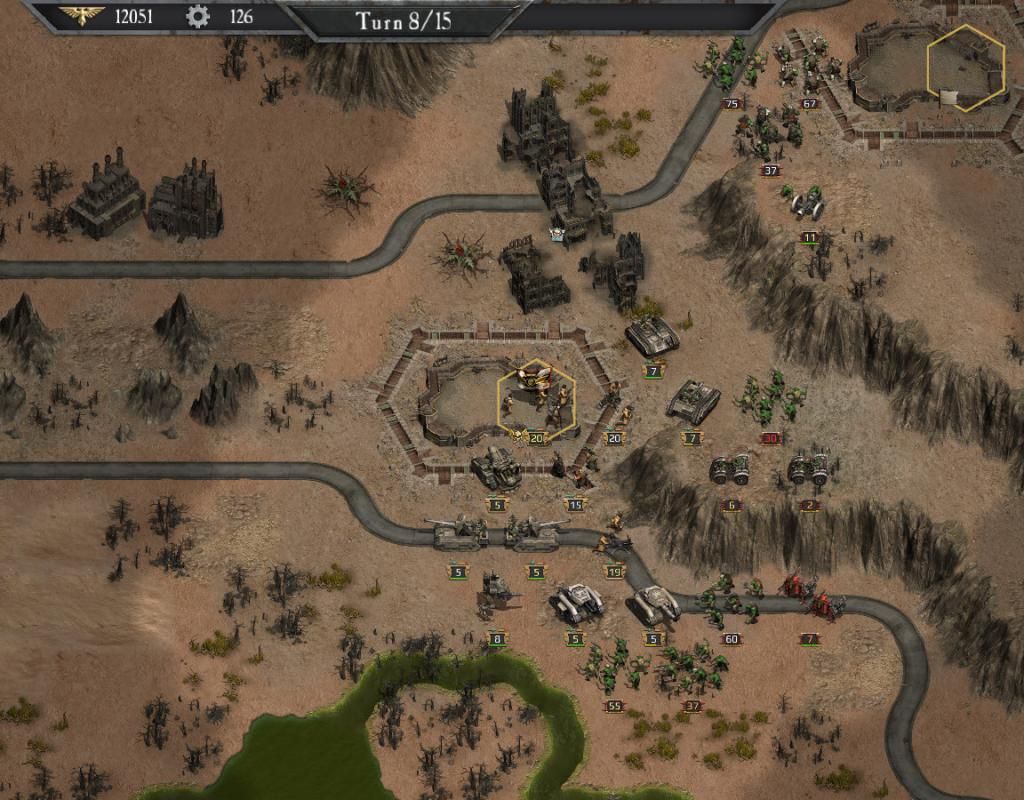
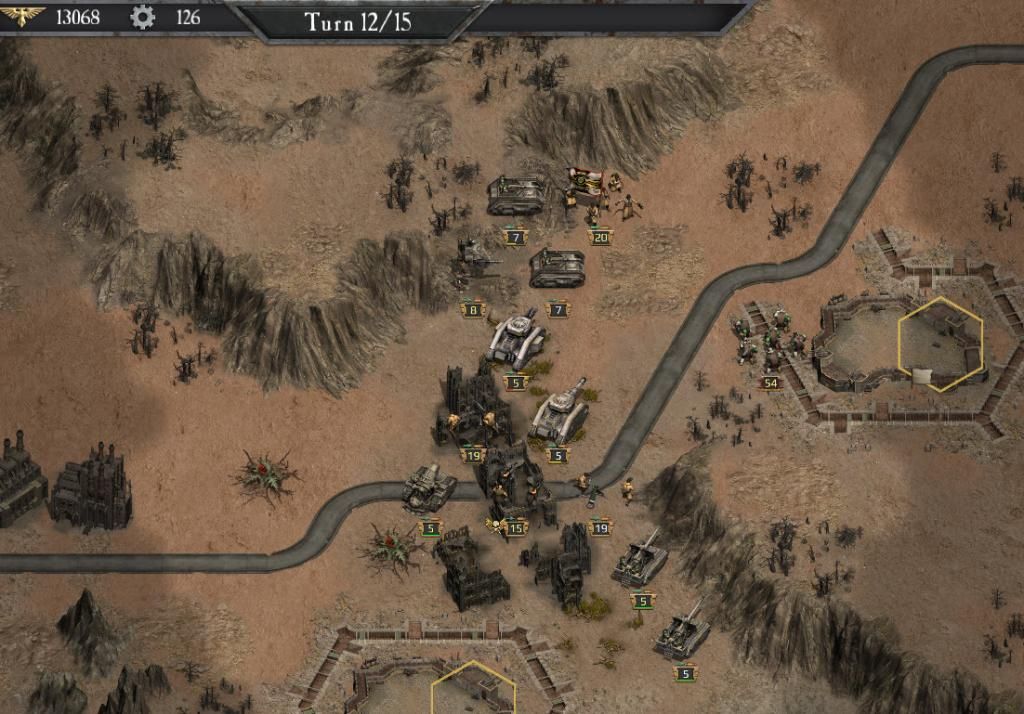
I keep my defensive line, hammer the orks, and fall back into the fortifications with my lighter units. No need to risk more fire from the cliff-top; I've got plenty of time.

Image

One my next turn I wipe out the last orks down in the corner. I switch my long-range units (snipers included) to pummeling the ork arty/support setup on top of the cliffs. That combo can be deadly if you don't deal with it correctly.

Image

I've plenty of time left, so I just take it slow, using my superior spotting and range to hit the orks again and again, without really taking much fire in return.

(total Steel Legion losses thus far: 2 Inf str, one from each of my support teams)

Image

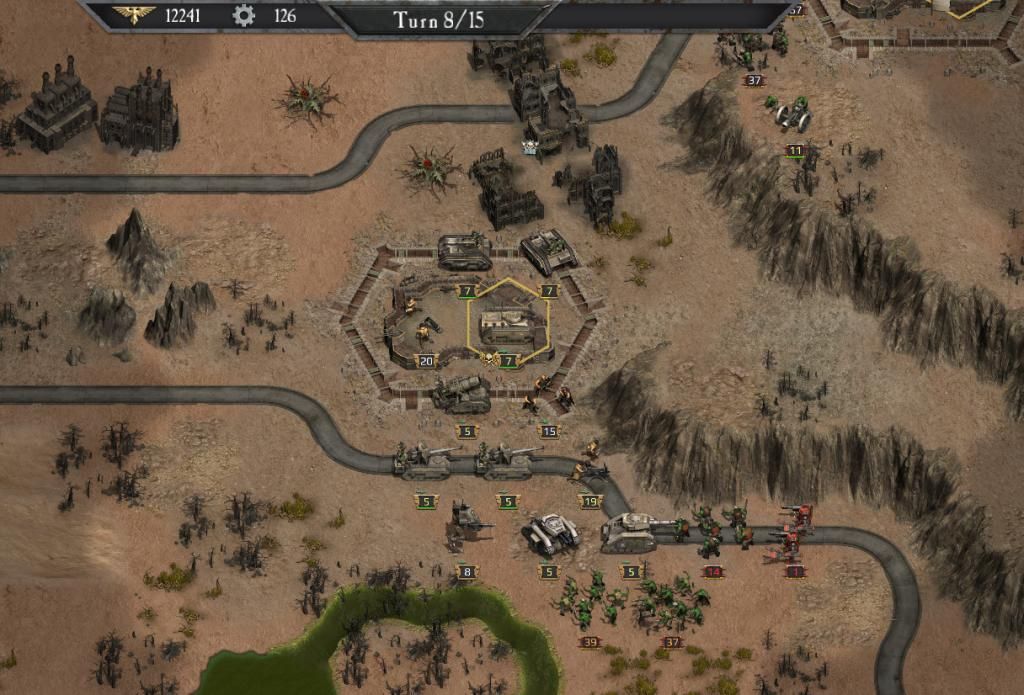
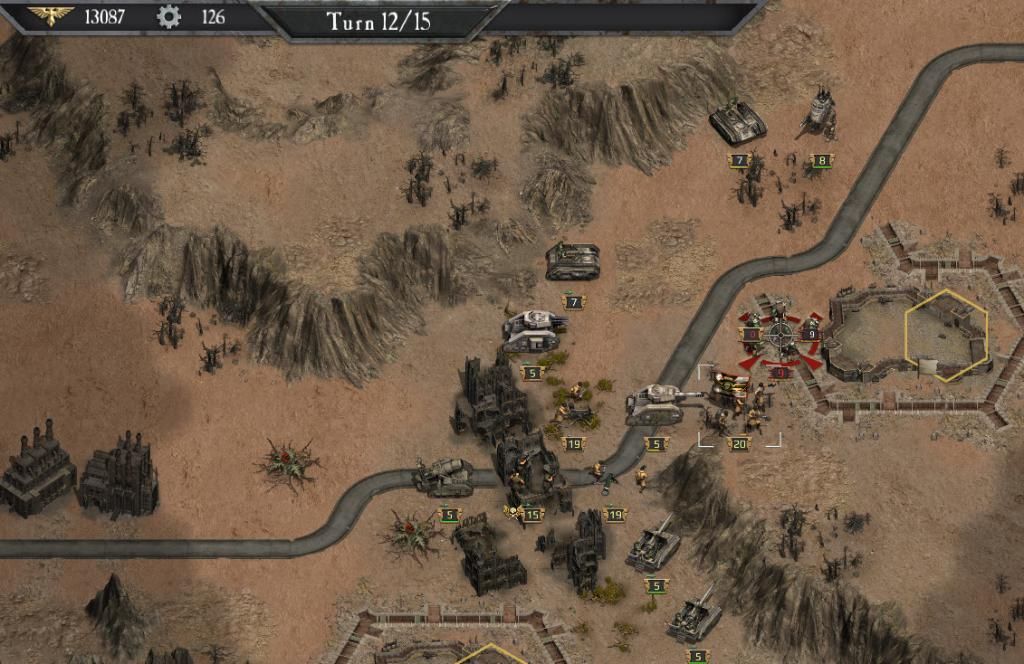
I use the spot/long range combo the wipe away the ork armor. Only 1 ork left. No additional damage on my part.

Image

The final elite orky unit proves incredibly resilient, hunkering down in the trenches and absorbing fire from EVERY SINGLE UNIT (I'm starting to dread meeting those over-strength mega-armored nobz in defensive positions!). In the end Maximus personally leads the charge that kill off the last nobz. He's awarded the Bronze Angel for his heroism.

Image

Maximus is pretty pleased with the performance of his troops. As is Goryle...enough so that he's not really talking to me anymore. Or maybe he went back to his master? I don't really care.

Overall I lost 2 pips of inf. That's laughably little. I've never lost so little, even playing on Normal difficulty. Granted I've played this scenario a couple of times before, but I'm thinking the VH diff is making me A) more cautious and B) more concerned with utilizing my units and the terrain to my advantage. I find myself planning several turns ahead, looking over the map for all sorts of cover and LOS-blocking terrain, etc.

My unit choices were sound I think. If I had some more slots I would have liked to have one Steel Legion Inf out there just to draw some fire. I really should have a few sponge units. The Bombard was a bit disappointing. The range of 5 was keenly felt vs the Basilisk's 6,a and it didn't really have many heavy ork units to fire on. The Range 4 Russ performed above expectation. I might get another.
Green Knight
https://www.youtube.com/c/GreenKnight2001
Bersercker
Administrative Corporal - SdKfz 251/1
Administrative Corporal - SdKfz  251/1
Posts: 137
Joined: Sun Nov 30, 2014 11:58 pm

Re: AAR 2nd War Campaign Very Hard

Post by Bersercker »

Didn't read it all, going to do it some other time, but
nexusno2000 wrote: Relatedly: why don't AT support have the Support trait? I think they should have. If they did it would be a very useful unit. Currently it's meh.
I think they are not very useful against light and medium ork vehicles and dreds, but thats only because their armor is not strong enough so they might be just as well attacked by small arms fire with similar results. On the other hand, against gargants\stompas\skullhamas etc anti tanks support is very cost-effective. Not sure about support trait, hard enough to use ork vehicles as it is...
nexusno2000
Sr. Colonel - Battleship
Posts: 1679
Joined: Mon Feb 24, 2014 5:15 pm

Re: AAR 2nd War Campaign Very Hard

Post by nexusno2000 »

Bersercker wrote:Didn't read it all, going to do it some other time, but
nexusno2000 wrote: Relatedly: why don't AT support have the Support trait? I think they should have. If they did it would be a very useful unit. Currently it's meh.
I think they are not very useful against light and medium ork vehicles and dreds, but thats only because their armor is not strong enough so they might be just as well attacked by small arms fire with similar results. On the other hand, against gargants\stompas\skullhamas etc anti tanks support is very cost-effective. Not sure about support trait, hard enough to use ork vehicles as it is...
Could be a multi-player balance thing? I'm focusing on pure campaign here, and AT falls short of both hvy bolter and mortars ATM. If it had the Support trait it would also be useful for defending against enemy armor. Maybe I'll find use for it later - when there is more ork armor? Could be the disposable edge I need to soften up the enemy before my valuable tanks strike. We'll see later.
Green Knight
https://www.youtube.com/c/GreenKnight2001
nexusno2000
Sr. Colonel - Battleship
Posts: 1679
Joined: Mon Feb 24, 2014 5:15 pm

Re: AAR 2nd War Campaign Very Hard

Post by nexusno2000 »

Act 1 - Mission 2: Pre-emptive Strike

I think I've established Maximus as the cleverly cautious type...he only charges when it's decisive.

Image

This is the point where I usually scrounge up the points for a Vulture. Not because it's any good, but it feels wrong not to have a flyer!

Relatedly: on my last play-through I gave the Vuture a BOOST; I set speed to 12, added 20 armor (has Evasion ever any effect???) and gave it range 4 hellstrikes. In all fairness the price should have been increased as well. At any rate: this made the Vulture a useful unit. It can still die if you're not careful and firing at range 4 limits the damage you do, but the high speed makes it like a mobile reserve/tank softener. A unique, in-character role. Anyway, I can't do that now, so maybe I'll do an ARR later with some "what ifs".

Anyway, with 78 Req left there is no point even trying to buy it.

Image

I have one new core slot. But little Req. So it's going to be Inf. I wanted to have a disposable unit anyway, so it kind of fits. Normally I'd never take conscripts over Infantry. The 75 vs 100 Req cost simply isn't worth it. The unit is bigger, but it's hitting less and dying more. Plus its super-slow AND can't spot shit. So no.

Image

BUT: after trading in my Chimeras from the Snipers (won't be needing them this time), I find I can't afford Inf + Chimera. But I CAN afford Conscripts + Chimera. Never thought I'd use them, but VH forced me.

Image

I have a little internal debate over my hvy bolter; should I swap it for another mortar? The Mortar gets fewer shots, but since both units almost always fire at range 3 the -10% vs -0% range penalty becomes significant. In the open, all other things equal, the mortar will do just a tad bit more damage. Plus it can fire over buildings. At range 2 the hvy bolter comes out slightly ahead; defensive fire often happens at range 2, so maybe it's a good trade. In the end I keep one of each. Just because.

Image
Green Knight
https://www.youtube.com/c/GreenKnight2001
nexusno2000
Sr. Colonel - Battleship
Posts: 1679
Joined: Mon Feb 24, 2014 5:15 pm

Re: AAR 2nd War Campaign Very Hard

Post by nexusno2000 »

My staff Astropath makes a very accurate reading of the Emperor's Tarot, warning me that out next battle will be pretty lame.

Not much to do except spot + long-range fire. Orks don't spot me back so won't fire in return.

Image

Scouts moving along the flank...to spot.

Image

It quickly becomes apparent that this particular group of orks is even worse led and equipped than normal. Maximus takes a nap, leaving his XO, Major Cassandra in charge of operations.

Image

Enveloping the ridge before moving to seize the town.

Image

For lack of better things to do my tanks kill grots all day long. Cassandra reports to Maximus' command tent for a...debriefing.

Image

Bored I try to send my Conscripts into harms way, but their Chimeras are too intimidating for the orks to fire at them.

(on a more serious note - note again how the orks don't fire on your Inf when they go turtle)

Image

Maximus grows bored and leads a charge against the remnants of an Ork gun battery.

(I take 1 damage; I didn't need to, but really, this was getting boring - Khorne craves blood!)

Image

New orders. So no need to take the town with the 2 objectives. That's good I suppose, as it's littered with the corpses of dead grots. Wouldn't want to touch any.

Image

End state turn 6. BAsically I start moving right with my forces. There are still lots of aux units around the hive, so the orks never give much chase.

Image

A few turns later my men wipe out every ork blocking our retreat; I won't bore you with the details. No more casualties.

This is one of the worst scenarios. It seriosuly needs some upgrading. There is potential, but it's not triggered right. Devs please?
Green Knight
https://www.youtube.com/c/GreenKnight2001
nexusno2000
Sr. Colonel - Battleship
Posts: 1679
Joined: Mon Feb 24, 2014 5:15 pm

Re: AAR 2nd War Campaign Very Hard

Post by nexusno2000 »

Act 1 - Scenario 3: Shuttle Search

Well, thank you Trelssa, the battalion (I only get a battalion??? I'm not even a colonel??? WTF!!!) is fairing pretty well: well joined together, most of the men heave their heads attacked to their bodies and so forth (did I get that right? do we have a sell-checker-servitor somewhere?).

How are you faring officer Trelssa?

Image

Nice to know (bit my Astropath already told me - he's quite the magician with that deck of tarot cards)

Image
Green Knight
https://www.youtube.com/c/GreenKnight2001
nexusno2000
Sr. Colonel - Battleship
Posts: 1679
Joined: Mon Feb 24, 2014 5:15 pm

Re: AAR 2nd War Campaign Very Hard

Post by nexusno2000 »

Maximus isn't feeling too well on this day. His thoughts are...elsewhere. He's contemplating splitting his forces in a fashion quite unlike his normally so focused self...

The Command platoon is lacking in men (the 1 hit I took last time) due to a shortage of Requisition (that feels a bit daft, one would like to have a sense of progression, of accomplishment).

Image

Anyway. The command dudes turn into AT dudes.

Image

...and back again. Only now they are 20...

(a slightly buggy code there, allowing this exploit, but hey, I'm not complaining)

Image
Green Knight
https://www.youtube.com/c/GreenKnight2001
nexusno2000
Sr. Colonel - Battleship
Posts: 1679
Joined: Mon Feb 24, 2014 5:15 pm

Re: AAR 2nd War Campaign Very Hard

Post by nexusno2000 »

Edit: after the esteemed fsx pointed out how the scenario's triggers worked (essentially the longer a unit stays on top of any objective, the bigger the chance of finding survivors there) I developed an urge to redo it in a more serious fashion.

I keep my forces together. There are 3 objectives that are fairly close together. If I occupy all 3 of them I'm bound to get mission complete well before the deadline. And I won't have to split my forces or otherwise overextend.

Image

The armored fist of the Steel Legion on the move (ratlings not included, but they aren't proper SL anyway, filthy abhumans!)

Image

I'm not in any kind of rush.

Image

Where are all the orks?

Image

There isn't much in the way of tactics here, except I used the old armor/turtle inf, backed with mortars to avoid the ork shooting at me. Near the top the 10 Str ork battlewagon fires at me (my bad for not hitting it with artillery before the ork's turn!). It opts to kill some mortars (sensible), but score one 1 hit (orks aren't that dangerous after all).

To the right I've sent my Sala to take the undefended crash site, improving my chances of finding survivors.

Near the bottom I'm setting up a small screen to prepare my advance down to the third objective.

Image

Did I mention that mortars rule? They kills 26 orks, then brevet Colonel Maximus charges...

Image

And goes turtle after killing the orks, just to show that it can be done, and is a very viable tactic (the grots wouldn't have attacked anyway, but I think it illustrates my point).

Image

The lone Sala keep looking for surviovors. The main force regroups and moves down the map.

Image

My scouts spot some orks...yonder. My scouts have some target practice.

Image

On the following turn I find the 2nd set of survivors.

Image

...and we get ready for an ork advance of sorts while waiting for extraction.

Image

Orks are hemmed in by terrain, tanks/turtle info and mortars. Other rain death from afar. SL take 0 damage.

Image

A vile battlewagon-thingy appears, killing a few of my least-valuable unit, the flamers. How very fortunate my astropath warned me that this vehicle would appear! Another mini-wave of orks precede it. This is the last credible ork threat before extraction. Imperial forces take no further losses.

Image

Overall a good game. I was a little careless with the 10 Str battlewagon, but luckily it didn't seriously hurt my mortar. Three pip of flamer collateral is acceptable.
Last edited by nexusno2000 on Wed Jan 28, 2015 8:41 pm, edited 1 time in total.
Green Knight
https://www.youtube.com/c/GreenKnight2001
nexusno2000
Sr. Colonel - Battleship
Posts: 1679
Joined: Mon Feb 24, 2014 5:15 pm

Re: AAR 2nd War Campaign Very Hard

Post by nexusno2000 »

Act 1 - Mission 4: Defending Minos Crossing

Edit: I'm back and ready to proceed. I'm a bit saddened by the fact that I've got 2 cores and no Req. So by taking the branch with Death Mire/Crash sites, I've actually caught up at a point in the campaign tree that has less Req than the previous scenarios. Or something like that. It's not very good game design IMO. I'm OK with having too little Req on VH, but this isn't the way to do that.

Image

I do the upgrade-and-back exploit to get my forces back to full Str. I'm going to consider turning in 2 Chimeras - or even downgrading my Command - to make room for some basic Inf or Conscripts.

More later.
Last edited by nexusno2000 on Tue Feb 03, 2015 4:51 pm, edited 1 time in total.
Green Knight
https://www.youtube.com/c/GreenKnight2001
nexusno2000
Sr. Colonel - Battleship
Posts: 1679
Joined: Mon Feb 24, 2014 5:15 pm

Re: AAR 2nd War Campaign Very Hard

Post by nexusno2000 »

Note: I re-did the Shuttle crash site scenario (see above).
Green Knight
https://www.youtube.com/c/GreenKnight2001
nexusno2000
Sr. Colonel - Battleship
Posts: 1679
Joined: Mon Feb 24, 2014 5:15 pm

Re: AAR 2nd War Campaign Very Hard

Post by nexusno2000 »

In the end I keep the Command - can't disband Maximus' own bodyguard! I hand in some Chimeras + downgrade my tanks into Demolishers. I have this idea that their high Def will be useful in this battle. I also thing they will do more damage to ork inf than the Russ (armour upgrade) variant. I've never tried this variant before, so not sure if it will work or not. One basilisk becomes a Medusa: I'm think the direct-fire Str 90, AP 20, RoF 3 gun will come in handy...should the orks field Deff Dreds with saws...for example.

That gives: 2xRuss Demolisher, 2xSala couts, 2x Basilisk, 1xMedusa

That gives me enough points to afford the following inf: 2xmortars (Chimera), 2xAT (no APC), 1 command (Chimera), 1 flamer (Chimera), 1 ratling snipers (no APC)

Not a very impressive force, but I couldn't afford more...

To compensate for my weakness, I deploy far back, to avoid any sudden ork attacks.

A wise choice as it turns out. The orks come in a great wave, but fail to do much damage. Had I been deployed along the front line of trenches, I would have lost units.

Image

I spend the next few turns clearing up the orks.

Image

Meanwhile the auxiliary forces get HAMMERED (not shown). They usually survive for me to reach them and relieve - usually netting a mortar, a hvy bolter, and a few inf. But not now: the VH diff is showing clearly.

Image
Green Knight
https://www.youtube.com/c/GreenKnight2001
nexusno2000
Sr. Colonel - Battleship
Posts: 1679
Joined: Mon Feb 24, 2014 5:15 pm

Re: AAR 2nd War Campaign Very Hard

Post by nexusno2000 »

On turn 4 I start moving forward: I manage to secure the bend of the mountains, which will be crucial in holding the ork advance. Relatedly: by turn 4 I'm usually up by the bridge, relieving the auxiliaries and bottling up the orks that are now rampaging across the plains. No need to rush this time; all the aux inf from the top fortification is gone...

Image

The only auxiliary still alive is retreating down south:

Image

The situation on turn 5 is stable. The orks aren't attacking my Demolishers - their Def is simply too high. I'm worried that I might not reach the river before the new ork attack wave. If I don't I'll be in trouble.

Image
Green Knight
https://www.youtube.com/c/GreenKnight2001
nexusno2000
Sr. Colonel - Battleship
Posts: 1679
Joined: Mon Feb 24, 2014 5:15 pm

Re: AAR 2nd War Campaign Very Hard

Post by nexusno2000 »

Fortunately I make the river in time.

The following setup proves quite effective:

The Demolisher is immune to grot attacks. Same with the Sala in the trenches. I avoid killing the grots; I use them as a living bottleneck. For the next few turn I hit the ork units on the far side of the river with long-range fire. They don't shoot back.

Image

The lower position is more tenous, but there are fewer orks here, so I manage well enough. Inf go turtle to present a mechanized wall against any orks wanting to attack.

Image

The turns after I get this. Maximus is incensed: he's just reached the defensive line of the river. Maximus' adjutant points out he was never supposed to advance to the river in the first place. The commander flies into a screaming rage; the SL does not sit meekly waiting to be shot at. They maneuver and conquer!

Image

Turn 10. Time to go. Force recon elements report heavy ork elements approaching the river. Massive walkers. Super-heavy tanks.

Image

...and down below. It looks a bit messy, but will have plenty of time to stabilize before any orks reach them.

Image
Green Knight
https://www.youtube.com/c/GreenKnight2001
nexusno2000
Sr. Colonel - Battleship
Posts: 1679
Joined: Mon Feb 24, 2014 5:15 pm

Re: AAR 2nd War Campaign Very Hard

Post by nexusno2000 »

My turn 13 starting position: should a race back at max speed, or should I try to delay?

Image

I decide to make a limited counter-offensive. It leaves my flamers exposed - but I get to see the power of the Medusa unleashed against the Deff Dred!

Image

Meanwhile, at the lower bridge: I set up a very conservative defense, using the buildings and my Def 75 Russ to good effect.

Image

I decide to wast my last few Req on reinforcing the last auxiliary.

Image
Green Knight
https://www.youtube.com/c/GreenKnight2001
nexusno2000
Sr. Colonel - Battleship
Posts: 1679
Joined: Mon Feb 24, 2014 5:15 pm

Re: AAR 2nd War Campaign Very Hard

Post by nexusno2000 »

It survives the first turn of fire...but the next turn a couple of Deff Koptas and a Skullhammer finish it off.

Thought for the day: It is better to die for the Emperor, than live for yourself.

Image

I pull back in the north.

Image

In the south it's actually tough and go for a while: have I made a bad mistake? Fortunately veteran Salas put otu a LOT of anti-inf fire, and is managed to hammer down the enemy sufficiently that he fails to keep up the offensive.

Not the placement of the inf with regards to the armor and the buildings. The Command can go turtle if needed, strike in melee or flee.

Image

Yikes! I pound the Skullhamma with long-range fire; then decide to play stupid and order another counter-offensive. Not the Medusa in the trenches; it gets very good odds vs. the Skullhamma and I get it down to Str 1. On the ork turn the Skullhamma charges the Russ and is knocked out. I lose only 1 Str from the Medusa (sad) and a few AT guys, but it's more luck than skill.

Image

I fall back some more: to the bridge and the buildings respectively. Good thing as Koptas and battlewagons are appearing. Up north I have good cover, but down south I'm concerned about my units on the bridge.

Image

The koptas go around the buildings (can't fly over!). They shoot at my Russ, damaging it slightly. I am relieved.

Image

At the top I use my considerable firepower to whittle away at the forward enemy units.

Image

Image
Green Knight
https://www.youtube.com/c/GreenKnight2001
Post Reply

Return to “Warhammer AAR”